“Why does that happen?” Kids are naturally curious, ready to explore the world and make the unknown known. Science activities for preschoolers are a great way to stoke that Curiosity, one of the 6Cs at the heart of the Begin Approach to helping kids thrive in school and life.
And it doesn’t have to be complicated or take a long time! Just 15 minutes of science can teach kids a lot.
Whether they’re making slime, experimenting with water, inflating balloons, or melting ice, preschoolers (and toddlers!) doing science projects practice observing and asking questions about the world, skills that will serve them throughout their lives.
Looking for easy experiments for kids that you can do quickly? The experts at Begin are here to help.
The Short Cut
- Science and discovery activities for preschoolers encourage their Curiosity, the strong and natural desire to make what’s unknown known
- Encouraging Curiosity helps kids develop a love of learning, which helps them in school and may make them happier adults
- Preschool science activities also help kids develop Critical Thinking and Content— (which includes core skills)
- Developing the 6Cs doesn’t need to be complicated. You can make a big difference in only 15 minutes a day!
Table of Contents
- Why Science Activities Matter in Preschool
- Tips for Doing Science Activities with Preschoolers
- 9 Fun Preschool Science Activities
Why Science Activities Matter in Preschool
Most kids aren’t going to come out of preschool knowing what a chemical reaction is, no matter how many baking soda activities they do. Luckily, picking up technical knowledge isn’t what matters at this age.
Great science activities for preschoolers introduce kids to the joy of discovery and plant the seed in their minds that exploring science is fun.
They also help kids develop background knowledge (like the fact that salt melts ice or some liquids are denser than others) that makes future learning easier.
Most importantly, preschool science activities encourage kids to ask questions, experiment, and manipulate things to see what happens—all important developmental milestones for building Curiosity!
Tips for Doing Science Activities with Preschoolers
Preschool science activities are all about exploration and discovery. Here are some tips for making the most of these hands-on learning activities.
- Embrace messiness: Science activities can get messy, but that’s part of the fun! Encourage your child to touch, mix, and explore with their hands. This engages their senses and helps them learn even more.
- Keep it simple: Don’t worry about using fancy science equipment or complicated experiments. Simple household items can provide endless possibilities for learning.
- Follow your child’s lead: Let them take the lead in their learning experience. Ask open-ended questions and let them develop their own hypotheses and ideas.
- Use scientific vocabulary: Preschoolers are like sponges, soaking up new words and concepts. Use age-appropriate scientific vocabulary to describe the activity. Over time, words like experiment, hypothesis, and observation will become familiar.
- Use safe materials: While most preschoolers have outgrown putting everything in their mouths, it’s still important to use safe materials during science activities. Make sure everything is nontoxic and suitable for young children.
- Connect it to real-world experiences: Help your child make connections between science and everyday life. For example, if you’re experimenting with vinegar and baking soda, talk about how you commonly use those ingredients in different recipes.
- Provide supervision: Whenever your child does a science experiment, make sure you stay close by and supervise them. You can answer questions, provide encouragement, and ensure their safety.
- Repeat activities: Don’t be afraid to repeat the same experiment multiple times. Repetition helps reinforce concepts and can help your child better understand the science.
- Have fun: Your enthusiasm and engagement will rub off on your child. Stay positive and try to enjoy the learning process as you explore the world around you with these fun preschool science experiments.
9 Fun Preschool Science Activities
Now, let’s put those tips into action! Here are 9 fun and easy science activities to try with your preschooler.
1) Explore Liquids and Solids with Fluffy Slime
This Curiosity-fueling activity from Little Passports, Begin’s award-winning line of hands-on activity kit subscriptions, uses a few basic ingredients to show kids that not everything is exactly a liquid or a solid—sometimes it’s a non-Newtonian fluid, a substance that acts a little like both!
What You Need
- 1 cup of glue
- 1/2 cup of shaving cream
- 2 1/2 – 3 cups of cornstarch
- A few drops of food coloring, to your liking
What to Do
- Empty your glue into a large bowl. Bit by bit, add the food coloring and mix until the glue is the color you want.
- Add the shaving cream. Mix well, so that the slime becomes thick and fluffy.
- Add in the cornstarch bit by bit while stirring the mixture continuously. This serves as the “slime activator.” Depending on the cornstarch brand you use, you’ll need somewhere between 2 1/2 to 3 cups.
- Your slime should be ready now! Let the kids experiment a bit. Left alone on the table or your hand, the slime should start to slowly ooze and flow like a liquid. But if you stress it (by slapping it, for example), it will harden! This property makes it a non-Newtonian fluid.
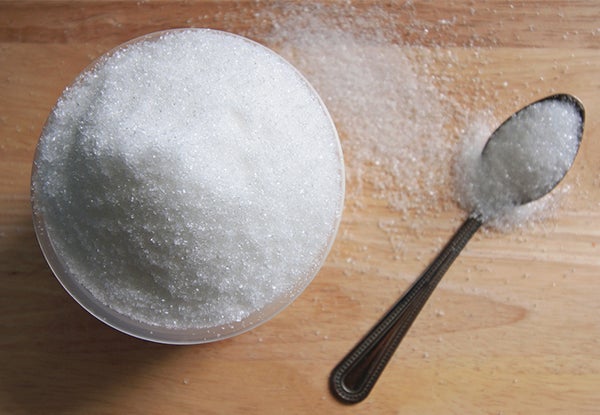
2) Make a Density Rainbow with Sugar and Water
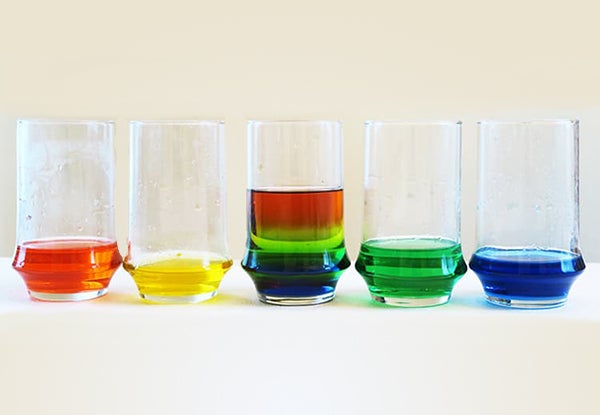
Add a little color to your science time with this fun rainbow activity. Combining colors usually results in a messy brown, but if your colors are liquids with different densities, kids can layer them in a glass for a mesmerizing effect!
What You Need
- 5 drinking glasses
- Warm water
- Sugar
- Spoon
- Food coloring in four different colors
- Small turkey baster
What to Do
- Pour 1/4 cup of warm water each into four of the drinking glasses.
- Add sugar and food coloring to the water. Each color will have a different amount of sugar in it.
- Add 1 tablespoon of sugar and 2 drops of red food coloring to the first glass. Stir vigorously so the sugar dissolves completely, creating red water.
- Add 2 tablespoons of sugar and 2 drops of yellow food coloring to the second glass, then stir vigorously.
- Add 3 tablespoons of sugar and 2 drops of green food coloring to the third glass, then stir vigorously.
- Add 4 tablespoons of sugar and 2 drops of blue food coloring to the fourth glass, then stir vigorously.
NOTE: You must get the sugar to dissolve completely. If it doesn’t, the colors won’t separate well when you combine them in the final steps.
- Time to make the rainbow! Transfer roughly half of the blue water into the empty fifth glass using the turkey baster.
- Ask the kids what they think will happen when you add the green water on top of the blue. Then, using the baster again, transfer half the green water into the rainbow glass. Make sure to add it slowly. It should sit on top of the blue without mixing.
- Using the baster, add the yellow, then the red.
NOTE: If the experiment isn’t working, try heating up your colored water for 5 to 10 seconds in the microwave and stirring it again to help the sugar dissolve.
This activity works because the less dense color solutions (the ones with less sugar) can “float” on top of the denser solutions (the ones with more sugar), making a rainbow!
You can use the remaining water to let the kids try some experiments—what happens if you add the blue water on top of the yellow or the yellow on top of the blue?
3) Use Ice and Salt to Make a Magic String

Can you pick up an ice cube using a string and a little bit of salt? If you know about melting points, the answer is yes—no tricky knots required!
This experiment is fun because it’s surprising, and for kids in colder climates, it helps explain why people salt roads, sidewalks, and driveways in winter!
What You Need
- 1 glass
- Water
- 1 ice cube
- Salt
- Scissors
- String
What to Do
- Fill the glass almost to the top with water, leaving a little space so it doesn’t overflow when adding the salt and ice cube later.
- Gently place the ice cube into the water.
- Sprinkle the salt over the ice cube.
- Cut a piece of string so it’s long enough to fit over the cup without falling in, then lay the string over the ice cube.
- Wait 1 minute.
- Ask the kids to predict what will happen if you pick up the string.
- Lift the string up by the ends—it should lift the ice cube with it!
This bit of magic works because salt lowers the freezing point of water. Sprinkling it on the ice cube causes its top to briefly melt, then refreeze around the string.
If you have some extra time, ask the kids what else they might be able to do with this newfound knowledge. Maybe they’ll think of another experiment to try!
4) Sink or Float
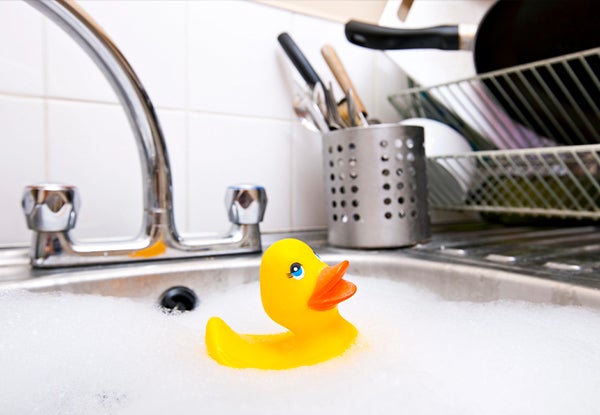
The sink-or-float activity is another classic experiment that’s always a hit with young kids. It’s easy to set up and requires just a few items from around the house.
As your child explores the concept of density, they’ll have fun predicting which objects will sink and which will float. They may even be surprised by the results!
What You Need
- A sink full of water
- Various objects of different shapes, sizes, and materials (such as a plastic toy, an apple, a coin, a rock, a sponge, etc. Do not use items with batteries, stickers, paper, or anything that may dissolve or become damaged if they get wet.)
- A large bath towel
What to Do
- Fill the sink with water.
- Ask your child to look at the items you gathered and select one.
- Ask them what will happen if they drop it in the water. Will it sink, or will it float?
- Have your child carefully put the item into the water and observe what happens. Then, take the item out and place it on the bath towel to start drying.
- Repeat this process with different items, discussing the results as you go.
- Challenge your child to look around the house and find one more item they think will float and one they think will sink.
This experiment is a great way to introduce the concept of buoyancy and continue building your child’s understanding of density. It will also encourage critical thinking and observation skills.
5) Create a Discovery Bottle
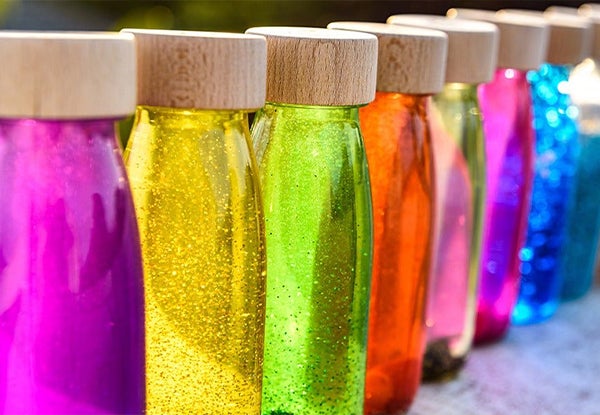
As you discovered with the Density Rainbow experiment, liquids have varying densities that determine whether they sink or float on top of each other.
In this experiment, you’ll continue to build on that knowledge by creating a discovery bottle to observe what happens when you mix oil and water.
What You Need
- A plastic bottle with a lid
- A funnel that’ll fit inside the bottle opening
- Water
- Vegetable oil or baby oil
- Food coloring
- Glitter (optional)
What to Do
- Fill the bottle about ¾ full with water.
- Add a few drops of food coloring (any color you’d like)
- If desired, add about a teaspoon of glitter to the bottle.
- Carefully use the funnel to fill the rest of the bottle with oil.
- Close the lid tightly and have your child gently shake the bottle.
- Observe what happens when you stop shaking. Do the liquids stay mixed together, or do they separate? Why do you think this is?
Encourage your child to experiment with different amounts of oil and water to see if the results change. What ratio is their favorite?
Note: With just a few different ingredients, you can use this experiment to create a snowstorm in a jar.
6) Will It Dissolve?
Sugar dissolves in water, but what about other substances? In this experiment, you and your child will test different household items to see if they dissolve when mixed with a liquid.
It’s a great opportunity to introduce the concept of solubility and how it differs between substances.
What You Need
- 5 small cups or containers
- Water
- Sugar
- Salt
- Old-fashioned oatmeal
- Sprinkles
- Flour
- Spoons for stirring
What to Do
- Fill each of the five cups halfway with lukewarm water.
- Ask your child to hypothesize which ingredients will dissolve into the water and which will not.
- Have them add one spoonful of a different substance to each cup (sugar, salt, oatmeal, sprinkles, flour).
- Have your child stir each cup until the substance is fully mixed.
- Observe what happens for each one.
- Encourage them to brainstorm other common ingredients they could test for solubility.
As you explore solubility, you can also experiment with different temperatures of water to see if that affects the outcome. Does anything dissolve in hot water but not cold water?
Have fun testing different ingredients to see what happens.
7) Build a Boat
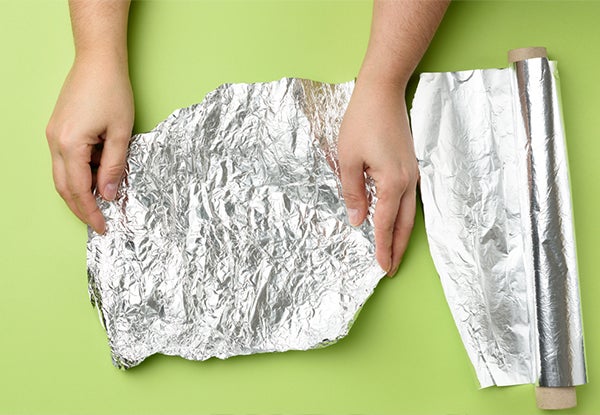
Can your child build a boat out of aluminum foil that’ll hold 10 pennies? Let’s find out in this fun and easy science experiment.
What You Need
- Aluminum foil
- Scissors
- A small plastic tub or sink filled with water
- At least 10 pennies
What to Do
- Cut a square of aluminum foil, approximately 6 inches by 6 inches.
- Have your child shape the foil into a boat. For this step, they can be as creative as they like.
- Place the boat in the tub or sink and let it float while your child observes.
- Ask them to place one penny into the boat. Does it stay afloat or start to sink?
- If it’s still floating, continue adding one penny at a time until it sinks.
- Count how many pennies were on the boat before it went down.
- Have your child try making a boat of a different size or shape to see if it can hold more pennies.
- Discuss why some shapes float better than others and what other household materials would make good boats. For example, could they make a boat from a plastic lid or paper plate? Encourage them to try.
Each time they experiment, keep track of how many pennies the boat can hold before sinking. Can they beat 10? What about 20 or 30?
8) Is It Magnetic or Not?

Magnets are fascinating and can provide hours of entertainment for children! Here’s a fun experiment to explore the world of magnets.
NOTE: Magnets can cause harm if swallowed. Choose a large magnet for this activity, and provide close adult supervision.
What You Need
- A large magnet
- A variety of household objects, such as coins, keys, paper clips, rubber bands, plastic toys, etc.
What to Do
- Ask your child to predict what’ll happen when you hold the magnet over a key.
- Test their prediction by holding the magnet over a key and letting them observe the results.
- Talk about the word magnetic and what it means. Explain how magnets have a force that pulls on certain materials.
- Have your child try holding the magnet over the other items you collected to see which ones are magnetic.
- Sort the items into two categories: magnetic and non-magnetic.
- Challenge your child to find more magnetic and non-magnetic items. Then, test them with the magnet to see if their predictions were correct.
This preschool science activity promotes observation, predictions, and critical thinking skills. It’ll also encourage your child to look curiously at the world around them and try to figure out what makes some items magnetic.
9) Close Up
The world looks different when you zoom in and focus on the small details. In this activity, your child will see everyday objects up close and learn about their unique features.
What You Need
- A magnifying glass
- A variety of objects (e.g., a leaf, coin, a raspberry)
- Paper and a pencil
- Crayons or colored pencils
What to Do
- Encourage your child to carefully study each item by looking closely through the magnifying glass. Ask them to try to describe what they see.
- After examining all the objects, have your child pick their favorite and draw a “zoomed in” picture of it.
- Try to guess which object your child drew.
- Take a nature walk with the magnifying glass for even more learning. Your child will find so much to observe in nature, from tiny insects to the intricate patterns on leaves.
By exploring objects up close, your child will develop their observation skills and learn to appreciate the small details that make up our world.
Cultivate Curiosity with Begin
These 10 science activities for preschool will help develop your child’s natural curiosity.
Curious how else you can help your child thrive in school and life? Begin makes kid-safe early learning products that fit even the busiest lifestyles.
See how our award-winning apps, hands-on activity kits, help your child get the best start to achieving their fullest potential with our HOMER app and Little Passports subscriptions or sign up for our emails with expert tips, product updates, and offers tailored to your child’s age.